


This AR-15 lower parts kit guide comes down to one habit: inventory the bag against the receiver before you drive a single pin. A lower parts kit is the fire-control group, the controls, and the pins, springs and detents that retain them, and the box label tells you far less than the parts list does. Buffer assemblies, stocks, grips and even trigger guards are often sold separately, so the kit that looks complete on the shelf may leave you a part short at the bench. We take these calls in the shop regularly, and it is almost always the same story: a detent gone missing, or a standard part being forced into a receiver built around a different pattern. Work clean, work with good light, finish with an unloaded function check, and confirm the current federal, state and local rules for whatever you are building.
What an AR-15 lower parts kit includes
An AR-15 lower parts kit is a collection of the small components that turn a stripped lower receiver into a working lower assembly. Kits vary, so we should never assume that two packages with similar names contain the same parts. The AR-15 lower parts kit guide starts with inventory, not installation. We lay everything out, compare it with the manufacturer’s list, and identify anything that must be purchased separately.
Core lower receiver components
The core group usually includes the magazine catch, bolt catch, trigger guard hardware, pivot and takedown pin assemblies, and the small springs and detents that retain them. Some kits include a trigger guard, while others assume the receiver already has an integral guard. The receiver itself is not part of a lower parts kit and must be treated as a regulated component where applicable.
The magazine catch retains the magazine, while the bolt catch interacts with the bolt carrier group after the last shot. Those parts are simple in appearance but depend on correctly placed springs and retaining hardware. We inspect each piece for burrs, damaged threads, or rough edges before it goes near the receiver.
Fire-control group parts
The fire-control group normally consists of a trigger, hammer, disconnector, and their pins and springs. Spring orientation matters, and the parts must be installed in the correct relationship to one another. We do not substitute a random spring or pin because a similar-looking part can change how the controls behave.
A standard trigger may suit a general-purpose rifle, while an upgraded trigger can be selected for a more specific shooting purpose. The right choice is about predictable control and fit, not simply a lighter pull. Any trigger that does not pass a careful function check stays out of service until a qualified professional examines it.
Controls, pins, and springs
The safety selector, selector detent, detent spring, takedown pins, and associated retainers complete the control hardware. A pistol grip often captures the selector spring, but the grip may not be included. The tiny detents deserve a tray or magnetic parts dish because they are easy to lose and difficult to replace by appearance alone.
We also check whether the kit includes a buffer retainer and spring. That hardware is commonly associated with the receiver extension installation, but package contents differ. A clear inventory makes it easier to see the missing-part problem before the build is partly assembled.
Parts that may not come with the kit
A lower parts kit may omit the receiver extension, buffer tube, buffer, recoil spring, stock, pistol grip, or trigger guard. Some manufacturers sell these items as a separate buffer assembly or build kit. Before ordering, we compare the package contents with the configuration we actually intend to build rather than buying by the shortest product name.
For a broader look at lower parts, receiver options, and build components, we can review AR-15 lower parts and mark off what is already on the bench. That simple step helps prevent duplicate purchases and keeps the final configuration intentional.
How to match a kit to your lower receiver
Matching the kit to the receiver is mostly a matter of confirming the receiver pattern, included features, and intended controls. “Mil-spec” is useful shorthand, but it is not a guarantee that every part from every package will fit every receiver. We read the receiver and kit documentation together, especially when the lower has an unusual trigger pocket, integrated guard, or ambidextrous control layout.
Mil-spec and non-mil-spec considerations
The phrase mil-spec generally describes a pattern or dimension, not a promise about material, finish, or quality. A non-mil-spec receiver may use different geometry or proprietary controls. We follow the receiver manufacturer’s compatibility notes and do not force a standard component into a part that was designed around a different system.
The receiver extension area deserves separate attention. Threads, rear takedown hardware, buffer-retainer geometry, and grip fit can vary by design. If the documentation is unclear, stopping for advice is cheaper than repairing a damaged receiver.
Standard, enhanced, and ambidextrous components
Standard controls place the magazine catch, bolt catch, and safety selector in familiar locations. Enhanced components may change the shape or ergonomics without changing the receiver’s basic pattern. Ambidextrous components can add controls on the opposite side, but they may require a matching receiver or specific installation parts.
We choose the control layout around the shooter’s hands, training, and use case. A control that looks appealing in a photograph is not automatically an improvement for every rifle. The key is to verify the component’s stated compatibility before mixing parts.
Compatibility with stripped and 80% lowers
A stripped lower is a completed receiver that lacks some or all of its small parts. An “80% lower” is a marketing term that does not by itself establish a legal category; the unfinished receiver and the work performed on it can raise federal, state, and local questions. We should confirm the current rules before purchasing or machining anything — ATF’s Definition of “Frame or Receiver” final rule is the primary source on when a partially complete AR-15 type receiver counts as a firearm, and it is worth reading before money changes hands.
For a stripped build, we can compare the receiver and parts choices in a receiver selection guide. The guide is useful for separating the practical appeal of a custom build from the transfer and compliance questions that accompany a serialized lower.
Checking the manufacturer’s parts list
The parts list is the final authority for what comes in the package. We spread the components on a clean mat, count pins and springs, and compare each item with the diagram or list. If a part is unidentified, we set it aside rather than guessing from size alone.
A useful check includes these questions:
- Is the trigger guard included or integral to the receiver?
- Are the grip, selector hardware, and grip screw included?
- Does the kit include buffer-retainer hardware but omit the receiver extension?
- Are the controls standard or designed for an ambidextrous lower?
After that comparison, we can order only the parts that match the receiver and the intended build. If the package list and the contents disagree, we contact the seller or manufacturer before assembly.
Choosing the right AR-15 lower parts kit
The best kit is the one that matches the receiver, the shooter, and the intended use without leaving surprises on the workbench. We start with the trigger and control requirements, then decide whether a complete kit or a more selective build kit makes sense. Our AR-15 build guide provides a wider parts-planning view when the lower is only one piece of a complete project.
Complete kits versus build kits
A complete lower parts kit is convenient because the small hardware is packaged together. A build kit may separate the trigger, grip, receiver extension, or controls so we can choose those components individually. Neither approach is automatically better; the useful question is whether we value speed and simplicity or want tighter control over each part.
We also check what “complete” means on the package. It may cover the lower parts but not the stock, buffer assembly, or receiver. Writing a short purchase list before ordering keeps the budget and the build sequence clear.
Selecting a trigger for your intended use
For a general-purpose rifle, we look for a trigger with a predictable break, positive reset, and secure installation. A competition-oriented setup may prioritize a different feel than a defensive or training rifle. We avoid choosing by pull-weight number alone because installation, reset, and safe operation matter just as much.
The trigger should match the shooter’s experience. New builders benefit from a familiar, uncomplicated control arrangement, while an experienced shooter may have a well-defined reason to select an upgraded trigger. In either case, the manufacturer’s instructions control the installation and adjustment limits.
When upgraded controls are worth the cost
An upgraded safety selector, magazine catch, or bolt catch can make sense when its shape or location solves a real handling issue. Larger or ambidextrous controls may help a particular shooter, but they also introduce compatibility checks. We spend the money where the change supports the rifle’s purpose rather than adding parts simply because they are available.
A good way to prioritize is to identify the control we actually struggle to reach or operate. If there is no clear problem, the standard component may be the better fit. Western Sport’s AR-15 upgrade guide offers a broader way to rank upgrades by use rather than appearance.
Spotting low-quality or incomplete kits
We inspect the package for a complete parts list, consistent finish, clean machining, and springs that are not kinked or misshapen. Missing documentation is a reason to pause, not a reason to improvise. We also compare the kit with the receiver before installation, since an incomplete package can be discovered early.
At our counter, we match buyers to the configuration rather than treating every kit as interchangeable. Rankin Industries build kits are one option when we want a coordinated path from components to a complete project, but we still verify the exact contents and receiver compatibility for the specific order.

Tools and workspace for a lower build
Lower assembly does not require a large shop, but it does require control over the work area. We need a stable bench, bright light, and tools that fit the fasteners without slipping. The receiver should be supported without crushing or scratching it, and the small parts should remain visible from start to finish.
Essential hand tools
A basic setup includes correctly sized punches, a small hammer with a non-marring face, hex or Torx drivers that match the hardware, a flat work surface, and eye protection. A bench block helps support pins while they are driven. We use the right driver size instead of trying to make one tool fit several fasteners.
The exact tools depend on the receiver and components. We read the instructions first, then gather only the tools called for. That prevents the common mistake of beginning with a nearly complete bench and stopping halfway through the job.
Helpful specialty tools
A pivot-pin installation aid, roll-pin starter punch, torque wrench appropriate for the manufacturer’s stated fasteners, and padded vise blocks can make the work more controlled. These tools are especially helpful for a first build or for a receiver with tight tolerances. They do not replace careful alignment or the manufacturer’s instructions.
The point of specialty tools is not speed for its own sake. It is to keep pressure straight, protect the finish, and reduce the temptation to use pliers or excessive force. We can also ask a qualified gunsmith to handle a step when the proper tool is unavailable.
Protecting the receiver and small parts
We cover the bench with a non-marring mat and place springs, detents, and pins in labeled sections. Painter’s tape can protect nearby surfaces from a punch, but it is not a substitute for controlled tool placement. We keep fingers and eyes out of the line of travel when compressing spring-loaded parts.
Before moving to the next assembly, we inspect the area for finish damage and confirm that no spring or detent has escaped. A slow check now is easier than finding a missing part after the receiver is closed up.
Safe workspace and parts organization
A clean workspace should be separate from ammunition and free of distractions. We keep the firearm unloaded, remove the upper receiver when appropriate, and control access to the bench. A shallow tray, parts diagram, and phone camera can help us document the original layout without turning the process into guesswork.
We can sort the parts into functional groups before starting: magazine catch, bolt catch, fire-control group, selector, and takedown hardware. That organization reduces interruptions and makes a pause in the work safer. If we are buying related upper components, Western Sport’s AR-15 upper parts category keeps that separate from the lower’s small hardware.
Lower parts kit installation overview
We treat installation as an overview of the sequence, not a substitute for the receiver and component instructions. The order can vary slightly by design, and forcing a part is never a normal step. We work on an unloaded receiver, use eye protection, and stop when a pin, spring, or control does not behave as expected.
Preparing and inspecting the receiver
We first confirm that the receiver is the correct model for the kit and that its openings, threads, and bearing surfaces are clean. The parts are laid out and compared with the documentation. Any shipping damage, obstruction, or mismatch is handled before assembly begins.
We then identify which operations require spring tension and which require a supported pin. That small bit of planning matters because many scratches happen when a builder reaches for a tool while holding the receiver awkwardly. If the receiver needs fitting or repair, we hand it to a qualified gunsmith.
Installing the magazine catch and bolt catch
The magazine catch and bolt catch are installed with their respective hardware, springs, and retainers in the arrangement specified by the instructions. We support the receiver and start roll pins carefully so they remain aligned. The catch should move freely under spring tension, without scraping or binding.
We test each control lightly before proceeding. If the magazine catch does not travel correctly or the bolt catch feels rough, we stop and inspect the spring, pin, and receiver opening. More force will not correct a misplaced part.
Installing the trigger, hammer, and safety selector
The trigger, disconnector, hammer, pins, and springs must be oriented exactly as shown by the component instructions. We keep the receiver supported while aligning the pin holes and never substitute a spring based on appearance. The safety selector is fitted only after the fire-control components are positioned as directed.
Once installed, the selector and trigger receive a preliminary manual check with the firearm still unloaded and the upper separated as appropriate. We are looking for normal movement, secure pins, and no unexpected release. A questionable trigger assembly is a gunsmithing issue, not a place for trial-and-error adjustment.
Fitting the takedown pins and grip
The pivot and takedown pins, detents, and springs are installed with care because those small parts can launch across the room. The grip may retain a selector spring, so its fit and fastener must match the receiver and instructions. We keep the detent under control and avoid compressing it with a sharp improvised tool.
After the grip and pins are fitted, we check that the pins move as intended and that the selector has the expected range of motion. The lower is not finished merely because every hole is occupied. It still needs a complete function check before it is joined to an upper or taken to the range.
Common installation problems and fixes
Most lower-build problems come from a misplaced spring, an incorrect part orientation, or too much force. We diagnose the symptom before removing anything, and we protect the receiver while correcting the issue. A careful pause is part of the build, not a failure of the build.
Misplaced springs and detents
A selector that will not hold its positions, a takedown pin that will not retain, or a catch that lacks spring pressure often points to a misplaced spring or detent. We compare the assembly with the manufacturer’s diagram and inspect the channel for debris. The receiver should be unloaded and supported before any correction.
We do not stretch, cut, or swap springs to make a control feel right. If the correct part is present but the channel or hole appears damaged, the receiver needs professional evaluation. Tiny parts are inexpensive compared with a damaged control system.
Trigger or safety selector issues
A trigger that will not reset, a hammer that behaves unexpectedly, or a selector that will not move normally requires the build to stop. We verify the orientation of the trigger, disconnector, hammer, and springs against the instructions. We do not file engagement surfaces or alter springs without the proper expertise and documented procedure.
The safety selector must not be treated as a decorative lever. If it does not positively correspond to the intended positions, the firearm stays out of service. A qualified gunsmith can identify whether the problem is installation, compatibility, or a defective component.
Pins that bind or walk out
Binding pins can result from poor alignment, burrs, incorrect springs, or pressure from a part that is not seated. Pins that move excessively may indicate a missing retainer or an incompatible component. We inspect rather than hammer harder, since force can deform the pin or receiver.
When a pin walks out during a manual check, we stop and determine why it is not retained. The answer may be as simple as a misplaced detent, but we confirm that before proceeding. Replacement parts should match the receiver and kit documentation.
Preventing scratches and damaged threads
Most finish damage is preventable with a bench block, proper punches, masking tape, and a straight approach to the pin. We keep steel tools away from exposed surfaces when a non-marring option is suitable. Receiver threads are cleaned and started by hand before any wrench is used.
We do not chase resistance with additional torque. Cross-threading, damaged screw heads, and crushed receiver edges usually begin when a part is started at an angle. If a fastener does not turn smoothly by hand, we back up and find the cause.
Safety, function checks, and legal considerations
Safety comes before completion photos or range time. We verify the firearm is unloaded, keep ammunition away from the bench, and follow the receiver and component instructions. Laws can change, and the rules may differ by jurisdiction, so this section is general information rather than legal advice.
Verifying the firearm is unloaded
Before handling the receiver or any assembled firearm, we remove the magazine, open the action as applicable, and visually and physically check the chamber. Ammunition stays off the work surface. If there is any uncertainty about the firearm’s condition, we stop and have a qualified person verify it.
During a lower-only build, we still control every related component and do not assume that separation eliminates all safety concerns. We keep the muzzle in a safe direction whenever an assembled firearm is present. The same discipline applies during cleaning; our AR-15 cleaning guide begins with the safety check for good reason.
Performing a basic lower receiver function check
With the firearm unloaded and configured according to the manufacturer’s instructions, we check that the magazine catch, bolt catch, takedown pins, selector, and trigger move correctly. We use slow, deliberate movement and stop if anything binds, releases unexpectedly, or fails to return. This is a mechanical check, not a live-fire test.
We also confirm that pins remain retained and that the grip and controls are secure. If the lower does not behave as expected, we do not attach an upper and hope the problem disappears. A qualified gunsmith should inspect unresolved issues.
Confirming safe, semi, and reset operation
Where the firearm is configured for those marked positions, we confirm that the selector prevents trigger movement in the safe position, permits the intended operation in the semi position, and allows the trigger to reset as designed. We follow the exact function-check procedure supplied by the manufacturer or a qualified armorer.
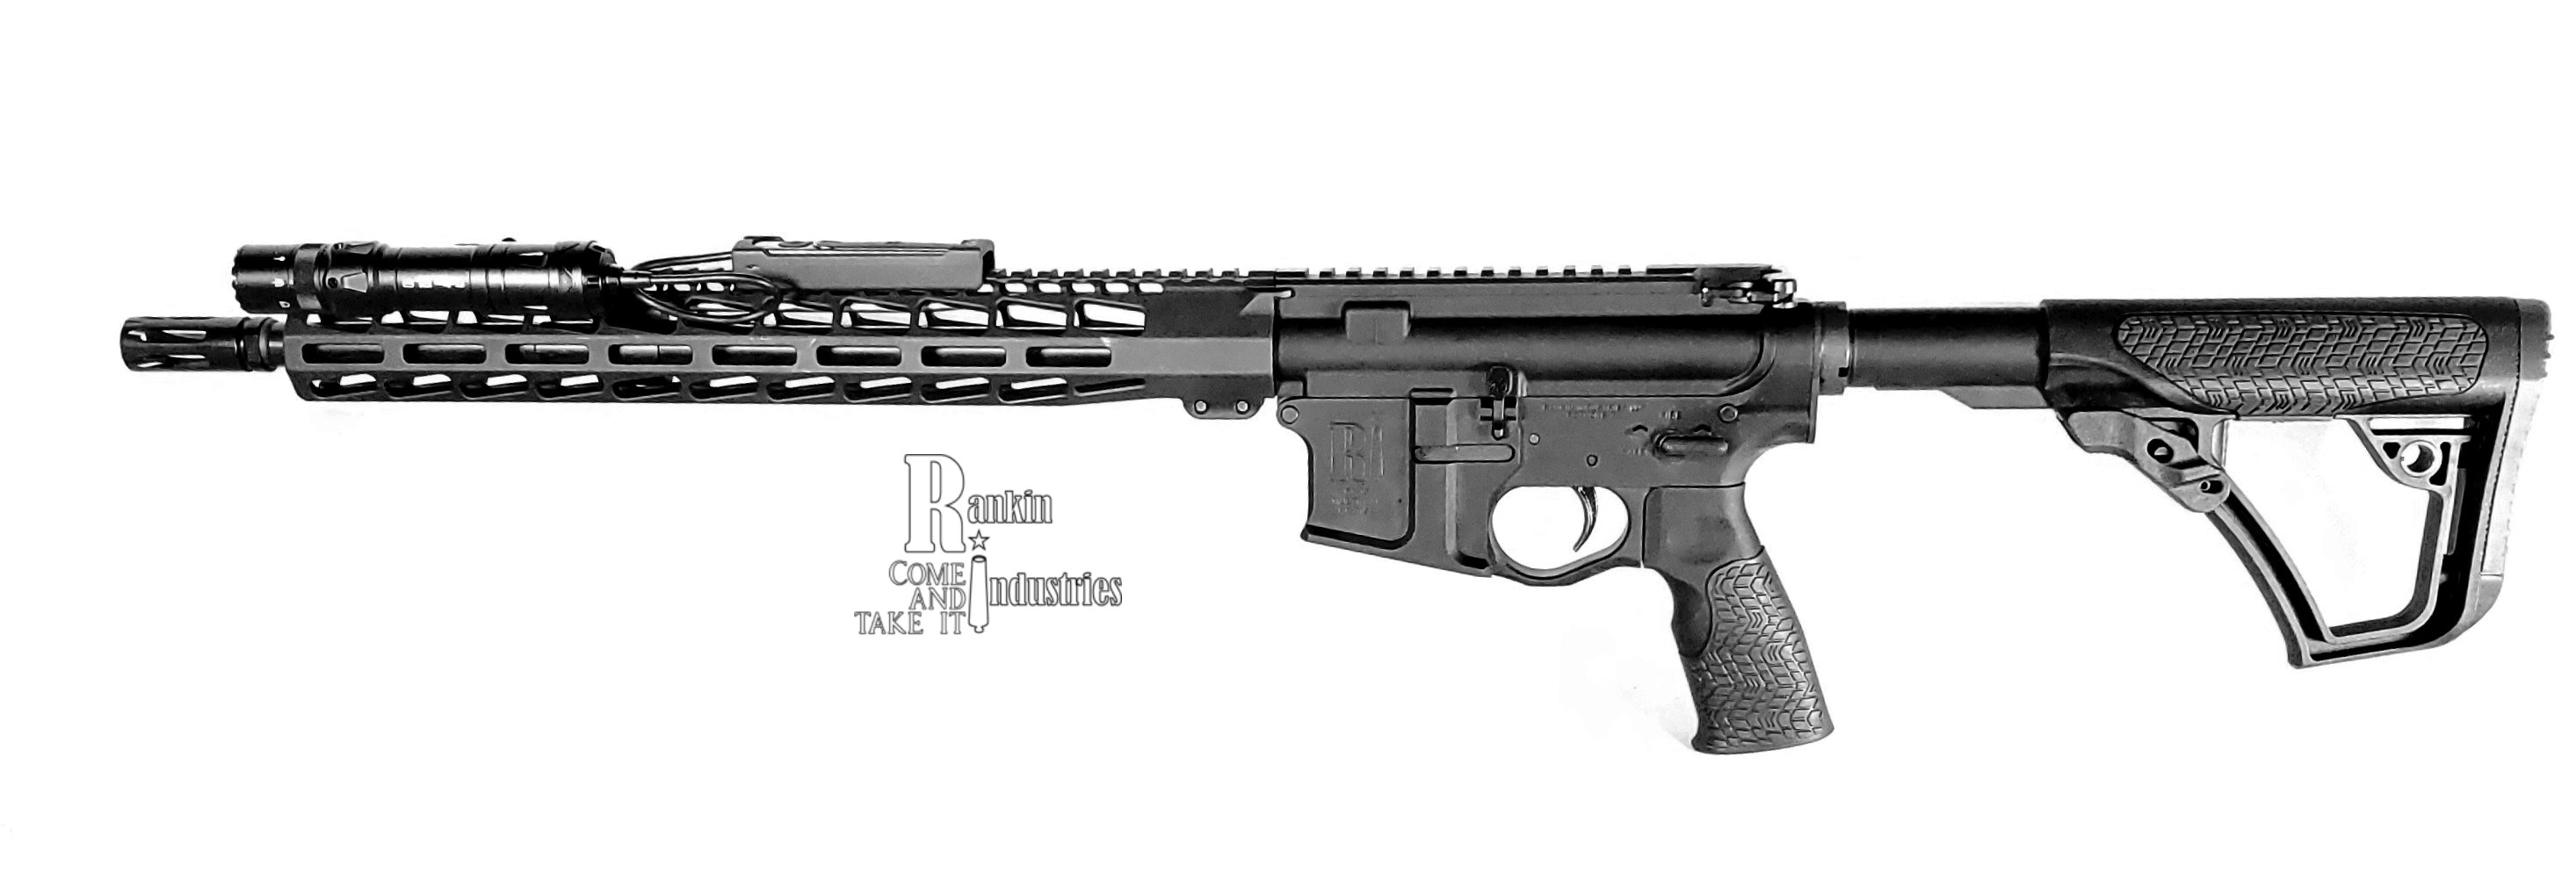
We do not diagnose a questionable result by repeatedly cycling the controls or by live-fire experimentation. A failed safety or reset check means the firearm stays unloaded and out of service until inspected. Rankin Industries’ Duty Rifle is an example of a complete rifle option for buyers who would rather avoid lower assembly and gunsmithing.
Understanding federal, state, and local requirements
A serialized lower receiver, unfinished receiver, transfer, possession, and configuration can be treated differently under federal, state, and local law. Requirements may also apply to age, background checks, storage, transport, and features. We are a Texas FFL and can explain the transfer process at our counter, but we do not replace a lawyer or official agency.
Before ordering, we confirm the current rules for the place where the receiver will be received and used. Buyers who are unsure should consult qualified counsel and the relevant government sources. For help choosing a lower parts kit, we can answer product questions while keeping the legal decision with the buyer and counsel.
Start Your Build With Help
When we want a parts kit, receiver, or complete configuration matched before checkout, we can contact Western Sport’s counter team for practical guidance. We carry AR-15 upper options, and our gunsmith can help us separate a manageable home project from a job better handled professionally.
Conclusion
A good AR-15 lower parts kit is less about having the most pieces in one package and more about matching the right parts to the receiver, using controlled tools, and checking every function before use. We inventory first, install without force, and treat any uncertain safety or trigger result as a reason to stop. That approach makes a lower build more predictable and keeps the focus where it belongs: safe, lawful, reliable equipment.
Frequently Asked Questions
What does an AR-15 lower parts kit usually include?
Most kits include the fire-control group, magazine catch, bolt catch, safety selector hardware, takedown hardware, pins, springs, and detents. The grip, trigger guard, receiver extension, buffer assembly, and stock may be sold separately.
Does every lower parts kit fit every AR-15 lower?
No. Many kits follow common patterns, but receiver geometry, integrated trigger guards, ambidextrous controls, and proprietary features can affect compatibility. We should compare the receiver documentation with the kit’s exact parts list.
Is the trigger included in a lower parts kit?
Usually, a standard trigger, hammer, disconnector, pins, and springs are included. Some build kits omit the trigger so the buyer can select an upgraded fire-control group separately.
Do lower parts kits include a buffer tube?
Often they do not. The receiver extension, buffer, recoil spring, end plate, castle nut, and stock are commonly sold as a separate buffer assembly or stock kit, though package contents vary.
What tools are needed for a lower parts kit installation?
Common tools include correctly sized punches, a non-marring hammer, suitable drivers, a bench block, eye protection, and a padded work surface. Specialty pivot-pin aids and roll-pin starters can make the work more controlled.
What should we do if the safety or trigger fails a function check?
Keep the firearm unloaded and out of service. Recheck the parts orientation against the manufacturer’s instructions, but do not file, bend, or alter engagement surfaces. Have a qualified gunsmith inspect unresolved problems.
Are AR-15 lower builds legal everywhere?
No single answer applies everywhere. Federal, state, and local requirements can cover receivers, unfinished receivers, transfers, possession, configuration, and storage. We should confirm current rules with official sources and qualified counsel before beginning a build.

Lance Rankin is the owner and Chief Gunsmith of Western Sport, a family-run Type 07 FFL and Class 3/SOT dealer in Roanoke, Texas, serving shooters since 2007. Born and raised in Texas with over 50 years of experience handling firearms, Lance purchased Western Sport in 2017 and turned his lifelong passion into his profession. He specializes in AR-15 and AR-10 platform rifles, manufactures Western Sport’s own AR-15 line under the Rankin Industries brand, and runs the shop’s in-house Cerakote coating operation. When he’s not behind the counter or the workbench, you’ll find him on his ranch deep into the night, hunting coyotes with an AR-15 and thermal optics. Lance holds an MBA and personally shoots and tests the products Western Sport sells.


