



Learning how to clean a suppressor starts with one rule: follow the instructions for your exact model. I’m Lance Rankin, gunsmith and owner of Western Sport in Roanoke, Texas, and most suppressor care questions I get come down to the same thing: using the right method for the can you own. Designs differ. A sealed rifle can and a take-apart rimfire can need very different care, so identify what you can service, work carefully, and stop when the manual leaves a question unanswered.
Shop the gear in this guide
-
Sale!Add to cart

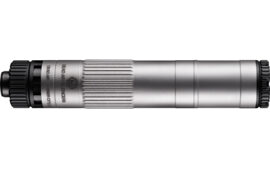
Dead Air Armament Mojave 9, Suppressor, 9MM, 7.64″ Long Configuration, 5.89″ Short Configuration, Modular Silver
Original price was: $1,099.00.$1,029.00Current price is: $1,029.00. -
Sale!Add to cart
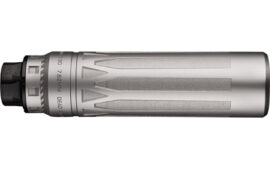
Dead Air Armament Nomad Ti XC, Suppressor, Direct Thread Mount, 6.74″ Length, 1.76″ Diameter, Silver
Original price was: $1,049.00.$999.00Current price is: $999.00.
Identify the suppressor type and follow its manual
Suppressors are not all built to be cleaned the same way. Before we reach for a brush or solvent, we check the model’s manual and confirm which maintenance steps the manufacturer permits. A suppressor care guide can help orient us, but the manual for the specific suppressor takes priority.
Check whether the design is sealed or user serviceable
A sealed model is not meant to be opened by the owner, while a user-serviceable model may allow some parts to be removed for cleaning. The distinction affects every step that follows, so we look for clear language in the manual rather than judging by appearance. If the design is unclear, we pause and ask the manufacturer before attempting to take anything apart.
Confirm which parts can be removed
A removable end cap does not automatically mean every internal part is owner-serviceable. We confirm which parts can come off, whether a specific tool is needed, and whether the manual gives an order for removal. Keep the original configuration in mind; guessing at hidden threads or forcing a stuck part is a good way to turn routine maintenance into a repair.
Look up approved cleaners and materials
Cleaner compatibility depends on the suppressor and its materials. We use the manufacturer’s approved products and tools, not a method that happens to work on a different model. This quick reference is a prompt to check the manual, not a substitute for its instructions:
| Item to verify | What we check | If the manual is unclear |
|---|---|---|
| Cleaner | Approved chemical or cleaning product | Ask the manufacturer |
| Brush | Permitted brush type and size | Use no brush until confirmed |
| Soaking | Whether soaking is allowed | Do not soak by assumption |
| Special equipment | Whether a machine or tool is permitted | Leave it out until confirmed |
That distinction matters: a method marked safe for one model may not be suitable for another. We follow the listed limits, and avoid mixing products or improvised methods.
Let the suppressor cool completely before handling
After firing, give the suppressor enough time to cool fully before touching, removing, or cleaning it. Heat can remain after the firearm itself feels safe to handle, so we do not use a quick touch test as the deciding factor. Once it is cool, we can proceed without rushing or trying to manage hot parts with gloves.
Set up a safe cleaning area
We want a clean, steady workspace before any parts come off. A clear surface makes it easier to track small components and keep cleaning products away from the firearm and other items. We also keep the manual nearby so we can check a step instead of relying on memory.
Unload the firearm and remove the suppressor
First, we make the firearm safe according to its manual, confirm it is unloaded, and keep ammunition away from the work area. We remove the suppressor only as its instructions allow and set it down once it is cool. If the attachment does not release normally, we stop rather than applying extra force.
Wear eye protection and chemical-resistant gloves
Eye protection helps guard against splashes and loose residue, while chemical-resistant gloves reduce direct contact with cleaning products and fouling. We choose gloves compatible with the cleaner being used, following its label. Gloves are not a reason to skip careful handling or handwashing after the work is done.
Work in a ventilated area with a protected surface
Good ventilation helps keep fumes from building up, and a protective covering makes residue easier to contain and clean away. We keep food and drink out of the work area, and avoid placing parts where they can roll off or become mixed with other hardware. These are small precautions, but they make cleanup more controlled.
Keep loose parts organized and labeled
Before disassembly, we set out a tray or another clean way to keep parts together. A simple layout prevents confusion when the time comes to reassemble. We can also take a reference photo if the manual allows disassembly but does not show the full order clearly.
A few habits help keep the bench orderly throughout the job:
- Set parts down in the order they come off.
- Keep small components in a tray or labeled container.
- Separate clean parts from parts that still have residue.
- Keep the manual and cleaner label within reach.
Once the parts are accounted for, we can focus on cleaning rather than searching the floor or guessing where something belongs.
Clean a user-serviceable suppressor
For a user-serviceable model, we work only within the limits the manufacturer describes. There is no universal sequence or solvent that applies to every design, so the manual stays open beside the work. The goal is to remove fouling without damaging surfaces or changing how the parts fit.
Disassemble it only as the manual allows
Follow the model-specific sequence and use only the tools the manufacturer specifies. If a part resists removal, we stop and check the instructions rather than adding leverage. Keep the parts in order as they come off, and do not take out components the manual does not identify as owner-removable.
Remove loose fouling with a nylon brush or cloth
If the manual permits it, a nylon brush or cloth can help lift loose residue without aggressive scraping. Use light, controlled strokes and avoid pushing debris into areas that are difficult to reach. We also avoid blowing residue into the air; a contained workspace and gentle handling are a better approach.
Clean baffles and end caps with approved products
Use only the cleaner and method approved for the specific baffles and end caps. Apply it as directed, and do not assume that soaking, scrubbing, or using a particular tool is safe just because it seems effective. Brushes, picks and solvents are in our cleaning equipment section, but check them against your manual before you use them on baffles. For a second opinion on whether a centerfire can needs cleaning at all, The Firearm Blog’s take on suppressor cleaning is a good read.
After cleaning, check the parts before moving on. Residue that remains in a hard-to-see area is a reason to follow the manual’s next step, not to improvise a stronger process.
Avoid tools or abrasives that can damage surfaces
Metal picks, harsh abrasives, and unapproved powered tools can scratch or change a surface. We stick to the permitted materials, even if a deposit looks stubborn. If normal cleaning does not resolve it, stop and ask the manufacturer rather than risking damage to a part that may be difficult to replace.
Handle sealed suppressors and stubborn deposits
A sealed suppressor calls for a different approach because the owner may not be able to access internal parts. In that case, we follow only the external or other maintenance steps the manufacturer identifies. Deposits that cannot be reached safely are not an invitation to open the unit or try every cleaning method we have seen elsewhere.
Don’t try to open a sealed model
If the manual identifies the model as sealed or not user-serviceable, we do not try to remove the tube, end cap, or internal components. Opening it can damage the suppressor and may affect safe operation. When we are uncertain about its construction, we confirm the model before doing anything beyond the approved care steps.
Use only cleaning methods the manufacturer approves
For an owner-serviceable step on a sealed model, use only the method the manufacturer lists. That may mean limited cleaning rather than a deep internal cleaning. Western Sport’s suppressor selection is for finding a model that fits a buyer’s needs; cleaning guidance still comes from the manual for the suppressor already in hand.
Don’t assume an ultrasonic cleaner or dip is safe
An ultrasonic cleaner, chemical dip, or other intensive method is not automatically appropriate for every suppressor. Compatibility depends on the design and materials, and the manufacturer’s instructions decide what is permitted. If a method is not expressly approved, leave it out rather than treating online advice as model-specific guidance.
Contact the manufacturer if fouling affects performance
If fouling appears to affect fit, function, or performance and the approved cleaning steps do not resolve it, stop using guesswork. Record what you observed and what cleaning steps you followed, then contact the manufacturer for direction. We should not keep firing a suppressor that appears damaged or does not function as expected.
Dry, inspect, and reassemble
Once cleaning is complete, we take the time to remove cleaner, let parts dry, and inspect them before assembly. Rushing this stage can leave residue behind or hide a problem. We compare the parts with the manual and do not force anything into place.
Remove all cleaner and residue
Follow the cleaner label and the suppressor manual for rinsing or wiping requirements. Remove visible residue from accessible areas without using a tool the manufacturer has not approved. If the cleaner’s instructions call for a particular removal step, complete it before moving on.
Let parts dry fully before reassembly
Allow every cleaned part to dry completely using the method the manufacturer recommends. Do not reassemble parts while moisture or cleaner remains in a crevice. If the manual specifies a drying approach, use that instead of heat or compressed air that has not been approved.
Check for damage, corrosion, or unusual wear
Inspect the accessible parts for visible damage, corrosion, or wear that looks different from the surrounding surface. A change that concerns us is a reason to pause and contact the manufacturer, not to polish or reshape the part. We also check for residue that might have been missed during cleaning.
Reassemble in the correct order without forcing parts
Use the manual’s assembly order and any specified tools or tightening guidance. Parts should not need to be forced into place; if alignment or fit is wrong, stop and check the sequence. After assembly, confirm that the suppressor is configured as described in its instructions before returning it to storage or use.
Set a cleaning and storage routine
A useful routine is based on the model’s instructions and what we actually observe, not a one-size-fits-all round count. Keep the suppressor clean and dry when it is stored, and make a note of any change in how it fits or performs. That record helps us spot patterns and gives the manufacturer clearer information if a question comes up.
Use the manual’s cleaning interval as the baseline
Start with the maintenance interval, if one is provided, in the model’s manual. If the manufacturer gives different instructions for different uses, follow the guidance that matches the way the suppressor is used. We do not substitute a schedule from another model.
Adjust for ammunition, use, and visible fouling
Ammunition and how often the suppressor is used can affect what we observe during inspection. Use visible fouling and the manufacturer’s directions to decide whether attention is due, rather than assuming every suppressor needs the same treatment. If the manual sets a specific limit, stay within it.
Store the suppressor clean and completely dry
Before storage, confirm that the suppressor is clean and fully dry, then keep it in a suitable location as the manufacturer recommends. Avoid putting away parts that still have cleaner or moisture on them. A consistent storage habit makes the next inspection simpler.
Keep a record of cleaning and any changes in performance
A brief record can include the date, the cleaning method approved by the manufacturer, and anything unusual noticed during inspection. Note changes in fit or performance as observations, not conclusions. If we need to ask the manufacturer for help, a clear record makes that conversation more useful.
Shop the gear
- Pistol can: Dead Air Mojave 9 in silver
- Centerfire rifle can: Dead Air Nomad Ti XC
- Cleaning equipment, checked against your suppressor’s manual first
- All suppressors
Before you buy, read the maintenance section of the model’s manual so you know how it is meant to be cleaned.
Conclusion
We clean a suppressor by following its manual, respecting the difference between sealed and user-serviceable designs, and avoiding unapproved tools or chemicals. A safe workspace, patient inspection, and fully dry parts make the process more straightforward. When the model’s instructions do not answer a question, we stop and ask the manufacturer.
Frequently Asked Questions
How often should we clean a suppressor?
Use the interval in the manufacturer’s manual as the baseline. If no interval is given, follow the manual’s inspection guidance and ask the manufacturer when use or visible fouling raises a question.
Can we clean every suppressor the same way?
No. Cleaning steps depend on the suppressor’s design and the manufacturer’s instructions. Confirm whether it is sealed or user-serviceable before choosing a method.
Can we take apart a sealed suppressor?
No, not unless the manufacturer specifically identifies an owner-serviceable step. Do not try to open a sealed model or force a component loose.
Is an ultrasonic cleaner safe for suppressors?
Not automatically. Use one only if the manufacturer approves it for the exact model and explains how it should be used.
What should we use to clean a suppressor?
Use only cleaners, brushes, and other materials approved in the manual. If the instructions do not name a product or method, check with the manufacturer before proceeding.
Should we clean a suppressor while it is warm?
No. Let it cool completely before handling or removing it, and follow the firearm and suppressor manuals for safe handling.
What should we do if a deposit will not come off?
Stop before trying a more aggressive method. Contact the manufacturer and describe the model, the approved steps already taken, and any change in fit or performance.

Lance Rankin is the owner and Chief Gunsmith of Western Sport, a family-run Type 07 FFL and Class 3/SOT dealer in Roanoke, Texas, serving shooters since 2007. Born and raised in Texas with over 50 years of experience handling firearms, Lance purchased Western Sport in 2017 and turned his lifelong passion into his profession. He specializes in AR-15 and AR-10 platform rifles, manufactures Western Sport’s own Rankin Industries parts and rifles, and runs the shop’s in-house Cerakote coating operation. When he’s not behind the counter or the workbench, you’ll find him on his ranch deep into the night, hunting coyotes with an AR-15 and thermal optics. Lance holds an MBA and personally shoots and tests the products Western Sport sells.


